Thursday, April 5, 2012

Contest Teaser!


Be ready! On Monday I plan to announce the rules and deadline for the contest.
As promised I managed to gather some great swag from some very generous people in the industry. I do encourage you to take the time to visit their sites and perhaps make a few purchases. As a patron of many and soon to be on those I have not already I feel they will not disappoint you!
My blog will also feature links to these supporters as recommended retailers. It is only fair they took the time to help out, that I point people towards them to keep them in business.
What are the prizes? Tons items that will make all your sanity bleed away and put you in a padded room! I am working now on how to divide up the prize lots as I want people to walk away with some great prizes for their hard work. I also plan to make this a pick and choose style so with luck people will walk away with something they really want.
Here is a preview of things to come and in no specific oder:
Avolakia over at Lead Adventure Forums agreed to send a winner a model and asked me which one I liked so, I picked the Dark Young of Nigurat! Who would not want one of his fantastic figures and no less than some tentacle beastie ready to gulp down some Threshold agents!
A £20 gift voucher from EM4 Miniatures to bolter up your collection of Miniatures, if you have not seen their great miniatures, check out my blog and miniature of the day posts on Lead Adventures, the models they make are just amazing and priced right! They give top notch service with my past order and quickly fixed a small error as well promptly.
A £10 gift voucher from Mutton Chop Miniatures, these guys are on my purchase list as they have some great looking figures that are great to add to your Strange Aeons collection.
Uncle Mike has supplied 3 copies including a variant cover of the Strange Aeons Magazine that includes the unique rules for Artifacts and a “Make you into an Elder God” kit.
Last but not least, Black Cat Bases really stepped up to the line and is sending about £100 in miniatures, dice and they are also putting a few “not even out for sale  yet figures” into the prize lot. How cool is that? Pretty damm cool if you ask me!
Again, if anyone wants to add anything else to the prize pool, let me know. As it stands we are right at £200 (maybe a bit short) in prizes and I am stoked about this contest.
Oh, one more thing….please take a moment to send each of the supporters a thank you and post up here thanking them for their support and generous donations. I am sure they would appreciate it. Later!

666 Page Hits!


I just logged into my blogspot account and saw that it just hit 666 hits as of now! While not a normal landmark for a blog, the nature of this blog demands that it should be recognised and honored!

Imagine that on 3/31 I just announced 500 as a landmark and within a few weeks 166 hits!
Stay tuned! I have the contest announcement about post up on Friday, I just need to figure out a closing deadline and we're off to the races!

Loving the Lurkers: Part 1 of 3 (Players Guide to Lurkers)


Lurkers are a different breed from playing a Threshold team and requires a totally different mindset at some points and yet some the elements in building a good Threshold team still applies to building a solid Lurker villains to challenge a Threshold player.  In this article I am going to break it into two parts, the first will discuss understanding the importance of leadership in the Lurker list and the second part building that list into something effective.

Command Structure Part 1: Picking a Leader
First, you have to develop a balance of leaders to followers. By this, you should have at least one model that has the “Command” ability so you can match a Threshold team on a basic level by being able to activate not only that model but two other models as well. By adding other models with “Lieutenant”, adding the “Improved Command” or adding other models with the ability to “Command” to allow more options for you to move more pieces in the game. Sadly, the last option can eat your points up quickly and the first two are easier to purchase with 1 extra build point yet is limiting in that same fact.

Models with Command: Cult Leader, Fishman (with Demagogue), Ghoul King, High Priest, Mad Scientist, Mummy, Rouge Threshold Character, Serpentman (with Demagogue) and the Witch.

Also, the Rouge Threshold Agent has Lieutenant and some other unit types like Swarms can take the Queen option to command just their specific type of models on the table, a cheaper option in some respects but limited in application.

Looking at the list above, you have a good variety of options, but many are very expensive as the cheapest two are 5 and 6 points (Cult Leader and Mad Scientist) and the highest could cost you 12 and 15 points base with no upgrades (such as the upgraded Fishman and High Priest). The Mummy and the Witch are your middle of the road options, but the witch is very weak but a spell caster plus when you start into upgrades she can start to be pricey also and she can only Command her Familiars. The Mummy is solid except he causes Fear so you have to look at other options to keep your human Lurkers from making Resolve checks. When you are looking at your build, this is a critical step as it determines what you have leftover to upgrade your leader and add to the rest of the Lurker list.

Another option is again to take Lieutenant on a cheap option like a Cultist (costing 2 points) that would allow you to activate another model. So, if you had a model with command (that is 3 models active), a Lieutenant can add another one allowing you to chain a Lurker group together allowing you to activate more models. The only downside is keeping within command range which I will talk about later.

Command Structure Part 2: The Minions
Every good villain has a cast of minions to die on his behalf and carry out his evil plans, so your leader should to!

Adding the shock troops can seem like an easy task but can quickly become a daunting task once you start looking at various options including Skills, Weapons, Plot Points, Spells and other Upgrades.

The only real limit is what is available for you to use as Lurker models as the rest is up to you. Do you feel like building something to a theme or just putting out an A team of villains to challenge the Threshold team?
One of the easy solutions to any psychology issues you may have in the game is simply taking the “Drug Crazed” Plot Point for 4 points. Pricey, but if you are human heavy and there is some factor of psychology this could become a very wise investment. A good case in point is the King in Yellow Scenario that would keep your “actors” sane while they summon the Yellow King in their play.

Many missions also require you to have at least as many Threshold models that the other player has or perhaps even one or two more. This has to be considered along with the command structure you want and how much you want to be able to activate Lurkers in the game to do things. If you have too few Lurkers once you take a loss or two, you may find you have wasted Command options and become frustrated.

An option to consider is taking some “Alert” Lurkers as I call them AL’s. They sit in a spot and guard a spot. Usually they (Cultists or Henchmen) have a rifle, shotgun or .45 pistol (if anything a .22) and they wait for a Threshold model to walk within 10” and you can take a snap shot at them. I found this works well with the Plot Point “The Stars are Right” for some nice rerolls making your Lurker even more effective. Plus, in the event the leader is taken out, they can still maintain their Alert status and be useful as you activate other elements in your Lurker list.

Sometimes a balance to a list is required for a good Lurker list to be effective. If you build a strong hand to hand and no shooting only to go up against a Threshold team packed full of long ranged firepower of rifles for example you could be in for a tough game. Having a good list of ranged ability and hand to hand allows your leader to use his Command skill to where it is best suited. Early on, a Cultist or two with a rifle can snipe at the Threshold team, then as they get closer, the hand to hand elements activate and go forward leaving the “shooter” Lurkers in Alert mode to defend some vital spot or protect something and if anything can be activated to assist in a fight as you take losses in the Lurker list.

Command Structure Part 3: Protecting your Leader

It is vital that you keep your leader from harm when possible as he (or she) is the key element to being able to activate more than one model at a time in the game. A canny Threshold player will try to take out the Leader quickly to limit the Lurker’s ability to act and react to the game giving the Threshold team a huge advantage.

Always try to keep your leader in or around some type of cover to gain some type of cover save, it may even be worthwhile to invest in an upgrade (like a vest or skill) that boosts their ability to survive (extra wound or CON for example) but again, these can get expensive quickly so these options will have to be looked at wisely. Also, try to watch range differences when you’re deploying and moving. Pay attention to the range of the Threshold weapons on the other side, because they will aim your way if possible.

Tuesday, April 3, 2012

Mini of the Day: 17

From the EM4 Miniatures line, Adventurer with rifle.

Mini of the Day: Day 13-16

Wow, I have been active posting pictures on Lead Adventures but not on my blog! Time for some catching up!

Day 13, Cultist with Tommy Gun by Uncle Mike

Day 14 Cultist with pistol from Black Cat Bases

Day 15 Cultist with Shotgun, Black Cat Bases

Day 16, Cultists with shogun by Uncle Mike

Morbid Adventures Review


Well, I got my copy of Morbid Adventures on Saturday and have had a few days to review the book.

First off, the book itself is made from high quality paper and spiral bound just like the rule book not like the type binding (comic book style) that you would find in Shocking Tales. By far one of the best quality books produced in the hobby industry.

The artwork is of better quality than the books prior with the standard old style photos done along with fantastic artwork that Uncle Mike should post up as screensavers! I would put the more tame ones on my PC at work and at home, well anything goes! Oh, Bob Murch did the cover at and it is amazing…

The revised Basic Scenario table has been a long time in the making since I started into the game as I was worried that the game would get “boring” like Necromunda and Mordheim with limited scenarios and you would have to home brew your own or pray the company releases new ones which is always the best option. The issue is as new ones come available you have to update the charts as well to keep up with the times. Uncle Mike and company did just that!

Variants to your old favorite scenarios puts a nice twist on the game including changing the table size, limiting table edges, the lurker has to complete the objective among great twists and turns that makes each game different even if you are playing the same scenario.

6 new spells from the Necronomicon! Powerful, hard to acquire without achieving quests and could backfire on your team if you continue using them over the long term without removing black marks earned from casting spells.

There are also 23 quests including the 12 new ones covering 1, 2 and 3 Map Piece Quests that you can play. Add that to the 7 basic scenarios and you have 30 possible scenarios to play now and this does not include any variants you use to add twists to your game. What else is nice is in the back there is a handy reference guide telling you the page of each scenario.

The combined Lurker and Weapons table are also very handy to me as I found myself flipping back and forth in my Shocking Tales books that I just acquired. This helps make game play easy. I do hope they put these as printable PDF on the website as I would love to print them and laminate them for easy reference.

Also, don’t be fooled when it says Lurker reference Guide, you get everything in one place to be able to play these fiends that once just haunted the pdfs and pages of Shocking Tales magazines that are out of print. If you want to add more bad guys to your pool and don’t have the Shocking Tales books, this is a must alone.

The solo and multi-player guides are good but may perhaps be the only thing in the book that could have used a little more love. The rules or rather guidelines provided are just that to allow you to flex a game so you can play a game by yourself to try out something or just short on players (I do recommend you do this at home as you would get weird looks in public playing a miniature game against yourself) or the multi-player version that could be great oppertunity for demo games or endings to a campaign with a gaming group of friends.

I found myself in a quandary when I played my solo game and after deploying I was spread out near both short board edges. So, I decided to stick to the one that had one Threshold model on that edge that would force me to activate just him unless I got my character with command near him to activate him along with the others. As it was stated in the rules you have to flex a few things to make it work in your favor. I do think deployment should be more than 5” as that means you could setup right within base to base charge range using a single action or after you crack off a shot at a target. A bit powerful if you ask me if the Lurker has nasty hand to hand, plus if you charge it seems they would not be able to use the Alert rule.

Overall, this book is a must for a Strange Aeons fan to expand their gaming options by adding lurkers to the pool, having a collected weapons list and several new scenarios can make for hours of gaming fun with friends. A recommended buy!

*psssst* Mike, you should bundle this together with Strange Aeons book into a deal now that the Shocking Tales are out of print.


Monday, April 2, 2012

Solo Strange Aeons Game: After Action Report

Well, tonight I played my first solo game of Strange Aeons using Morbid Adventures and had a blast! I wanted to try out the new rules of solo play and see how a threshold team would work. I also felt it was a good idea to make sure I know the rules well enough to teach someone else the game with some bit of competency.
The table, something I threw together.

Mission roll.

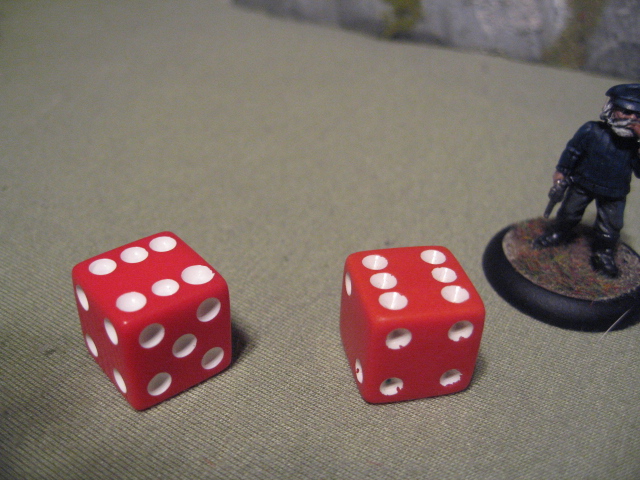
Black was the Lurker Dice, Red Threshold. Roll for first turn.

I rolled for the Mission and got “Escape…into danger!” and did the random deployment option.  After setting up the table I rolled off both sides as each group had 4 models and the Threshold won, placing first. The good Captain went down on the table; next up was a cultist that hid in the ruins to stop anyone from escaping the table edge I rolled randomly as the “exit point”. Next up the Priest ended up in the same sector as the cultist and hid behind the building ready to shoot the cultist if the opportunity arises or run away if things go badly as he was already on the edge. The Cult leader went down next behind a rock like hill with his shotgun aimed towards the captain. The professor with his rifle setup next to the shotgun to take a snipe shot at the cult leader early on. Last the Giant Vermin was placed between the zombie and cult leader.

The scatter after deployment.
Cultist hidden in the ruins.

Profressor and Sir Rothland

The Captain out in the open. Hey, what is tha behind the rocks! Look out!

Evil lurks....

Zombie and Rat prepare to chomp on some flesh...
The story drive is that the team was caught off guard and the priest was cut off by the team and they had to push past the enemy to escape or at least win the fight!

The good father hidden in cover waiting to help his fellows or run for help.
Random roll saw the Threshold take the first turn. Taking quick action Professor Richards using Lighting Fast fired two shots from his rifle at the cult leader and missed with a 1 and 2! Ugh! Next the captain snaps a pair of pistol shots at the cult leader. He hits once with a critical hit and gets another 6! But the cult leader passed his cover saves on a 4+ and laughed.  Sir Rothland with his shotgun runs up to support the captain.

The prof isn't a good shot in stressful situations.


The Captain hits and gets a crital!

Alas, evil has a cover save!
The Cult Leader wastes no time and fires his shotgun! Both barrels fills the air with lead and down goes the captain! Captain Black saves one hit but the other goes past him and adds +2 to the injury! Ouch! He takes a major wound and is out.  Sir Rothland sees his friend filled full of buckshot and drops face first into the mud having war flashbacks! The Rat scurries up and was unable to reach Rothland and the zombie climbs over the hill enjoying that -2 to his movement. *sigh*

The captain was not so fortunate. Major injury for him,
Turn two saw Rothland standing up as the professor shouts a warning of the rat about to attack him. He fires two shots, one hit but fails to injure the rat.

Roland faces down the rat.
The rat charges Rothland and they engage in a bloody battle, falling back into his old war habits he manages to slay the giant rat with his bowie knife. The Cult leader fires twice at Rothland but either fails to hit, one shot is saved by cover and the last shot clips him again and he falls to the ground.

That rat didn't have a chance!
Again the professor calls out to Rothland as the zombie is now shuffling towards his prone form. Rothland stands up ready for another messy affair with hand to hand combat.  The professor snaps a shot at the zombie, rolling a 1! ARG! He shoots again! Another 1!

The zombie stalks forward, guess he didn't see what happened to the rat!
The Cult Leader attempts to shoot Rothland again but lucky his middle name as the only shot that hit was deflected by the very rocks the cultist is using as cover! The zombie lurches forward and another fight ensue with Rothland again showing his craft with a blade.
At this point the Cult Leader is nervous, both of his allies are dead he flees back moving twice to get within command range of the cultist covering the ruins.
The professor skirts the edge of the table towards the tree line as Rothland runs towards the middle using the rocky slope to shield his approach.

The Professor and Sir Rothland close in on the cultists.
The cultist snaps off a few shots with his pistol and fails to wound Rothland with two solid hits. Father Antonio snaps off a shot and grazes the back of the head of the cultist knocking him face down to the ground.  The Cult Leader moves into the ruins and fires a shotgun blast at the priest and hits once. The good lord was with him as the wall saved any chance of injury against him.
The Professor swings forward to cover Rothland with his rifle and misses the priest again as his supernatural luck with cover deflects another shot.  Rothland fires the shotgun at the priest after advancing up and hits the priest again, gets a critical and uses his lucky option to reroll a 1 getting a total of 10 with the critical and taking out the cult leader.

Rothland watches the cult leader take some buckshot to the butt and back!
The cultist stands up and finishes his turn. The professor and Rothland advance up and fire on him after the Priest snaps another alert action shot and misses. Both shots from the rifle and shotgun miss and then the cultist fires back having passed his resolve check with a 5+ to keep his nerve the turn prior he fires in a wild abandon at the Rothland. This barstard must have a silver spoon when he was born…he promptly crits the cultist the next turn and takes him out with a minor injury.
Threshold wins…..
Meet the cast and crew:
Threshold:
Left to right: The Captain, Father, Sir Rothland and the Professor

Dr Paul Richards: Character with Bolt Action Rifle, Lucky Hat, Lighting Fast
Agent Sir Reginald Rothland: Double Barreled shotgun, Dex 4+ decrease
Agent Captain Jack Black: Lieutenant
Agent Father Donovan Antonio: Lucky

Left to right: Cultist with pistol, Zombie, Rat and Cult Leader.
Lurkers:

Cult Leader: Double Barreled Shotgun and Improved command
Cultist with .45 and bowie knife
Giant Vermin (Rat)
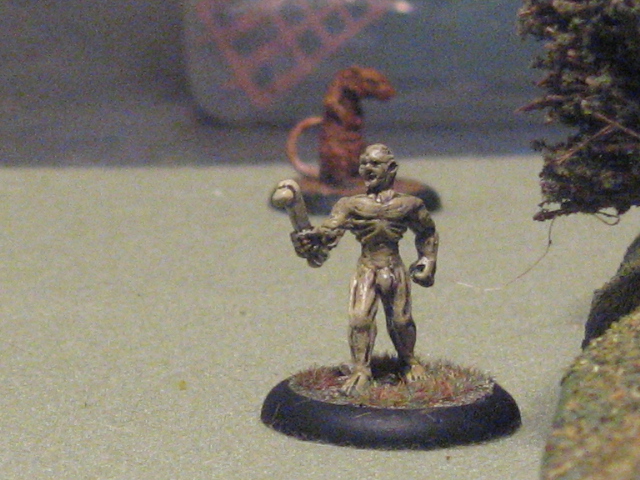
Zombie

After Game Wrap up....
The Captain got a Head Trauma for a -1 Resolve, not good!
The team finds one map piece and I have to pick new skills for the Professor, Sir Rothland and Father Antonio. Hrm, guess I will have to research this for another test game.
Overall, I did well with the rules I did forget the POWER rule for the shotgun, so I will have to keep that one in mind. The random deployment makes it hard to use every model within command range. The priest was left out of most of the game and was useless for the most part except as a possible last minute win by running off the table.